Unlike before, I will present this project/demonstration as a tutorial, to familiarize some random wanderer with the way you create projects in VPC.
It is supposed that you watched the movie that helps you set the environment (is posted at the end of the “What is VPC” page), and also you have installed the other tools like openOCD and STLink prgorammer (from texane user on github) under Linux, and in general, that you have experience working with STM32 microcontrollers and SPL library – a lot, right? Eh, you really need to see that movie!
Description
The application will try to demonstrate most of the functions of the ST7735R mini library using the Adafruit 160×80 0.96″ TFT display connected via SPI2 and other three GPIO_Output pins to our Nucleo board. The final result should look like in images below:


Wiring
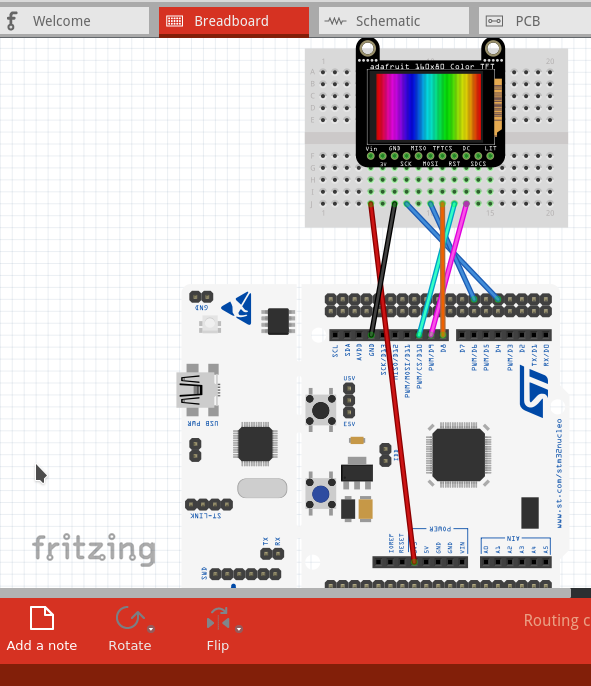
Just to be sure that I will not forget this, but really, browsing the code it gives you the required clues. BTW, I should have used Fritzing to make the schematic, maybe I’ll update this later… ‘Till then, here it is:
Nucleo          TFT
========================
ST7735_RST ->  RST
ST7735_DC  ->  DC
ST7735_CS  ->  TFTCS
SCK2       ->  SCK
MOSI2      ->  MOSI
3.3Vcc     ->  Vin
GND        ->  GND
EDIT: ok, I made the Fritzing schematic – please double check it. No responsibility from my part.
Creating, setting up and generating the initial code in VPC
Launch the VPC application and click on the “New project” button as in image below (see my black mouse pointer 😛 ):

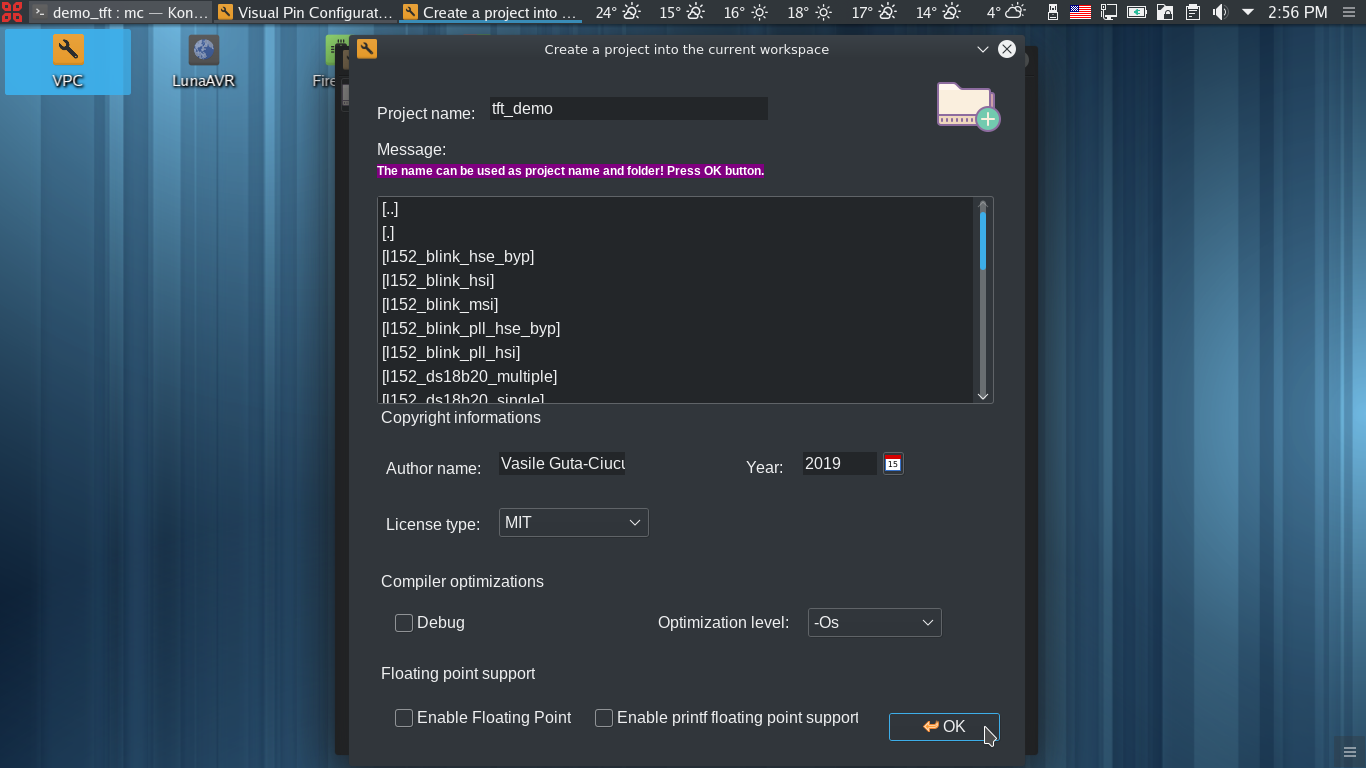
Lets name the project tft_demo, no particular reason. Make a habit in setting the author name, license type (not quite needed if this is an unpublished personal project), set the compilation parameters and anything else there, then hit OK:
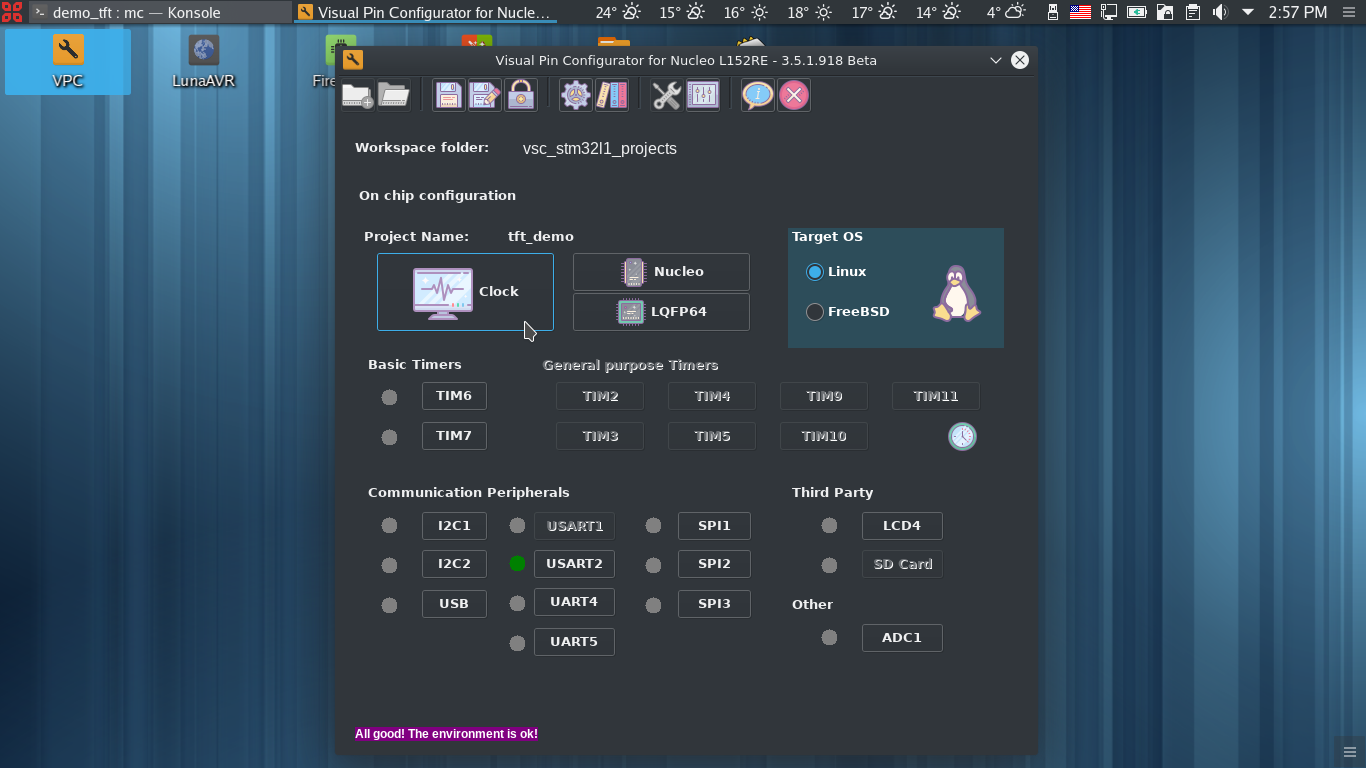
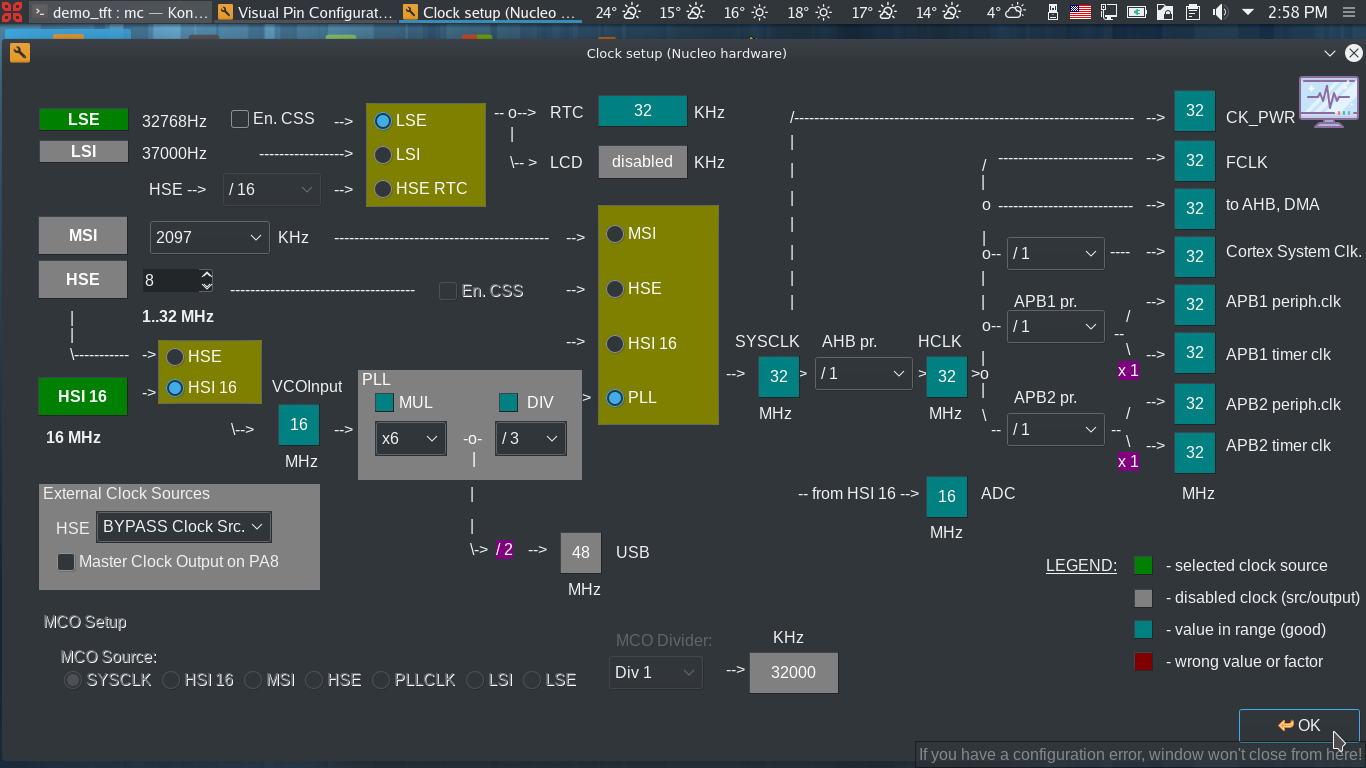
Now, there is always a good idea to click on the Clock button to set our clock frequency or just to see if the Nucleo board defaults are ok for our project:
Yes, defaults are ok so close the window:
Now lets set the pins in the Nucleo Window (click on that Nucleo button – but you can do the same in LQFP64 window):

In the Nucleo setup window lets click on the PB13 pin (see where my mouse pointer is) to set the SPI2 (you need to set only one component pin, the other two are set automatically):

In the appeared window set the pin exactly as in image below (no need to label the pin, VPC will do that automatically for SPI, I2C and USART peripherals – of course, you can label it if you are stubborn but some libraries depend on the label assigned by VPC) and close the window:

You can see that the component pins of SPI2 peripheral are coloured in green – hover the pointer over them to see the labels (if you enter in the LQFP64 window, the labels are shown in clear close to their corresponding pins).:
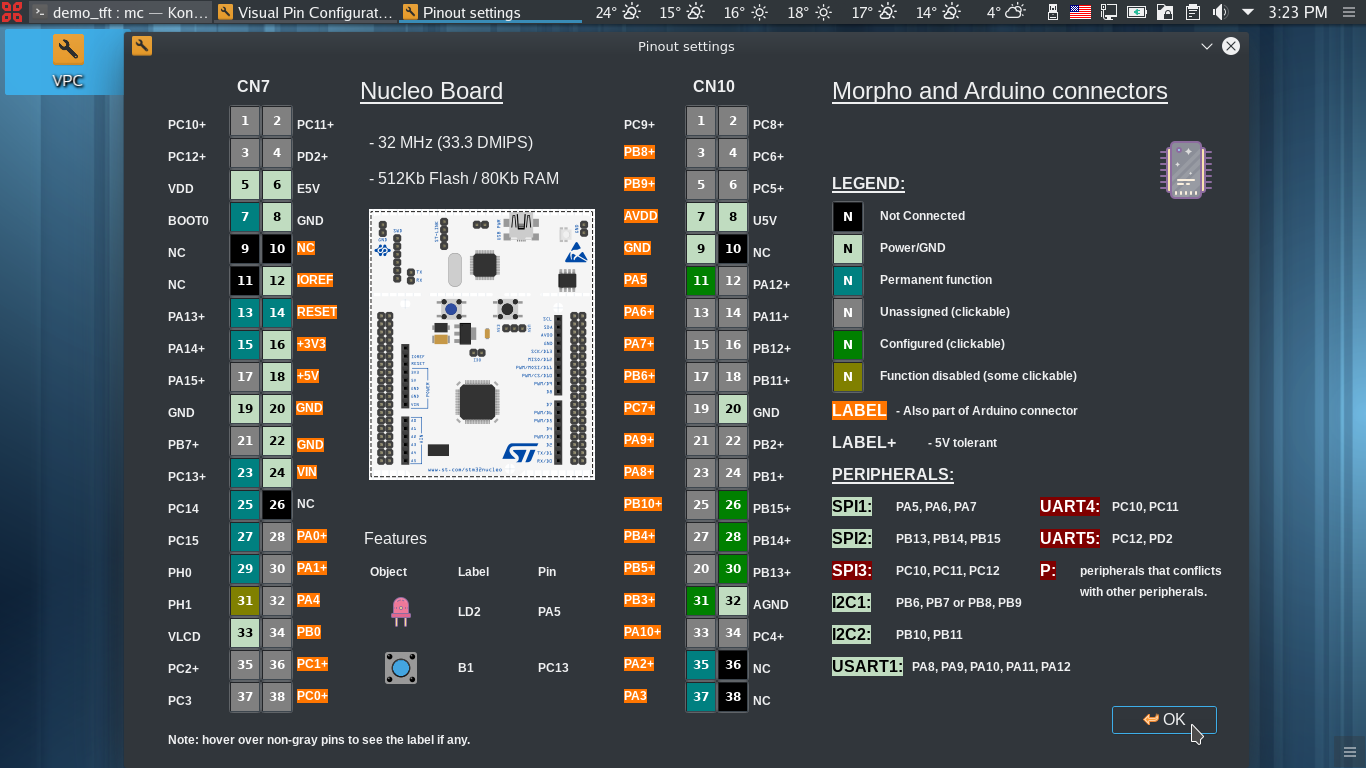
Now still in Nucleo window, we need to set the other three pins required by the TFT. Click on PB6 pin (see my mouse pointer):
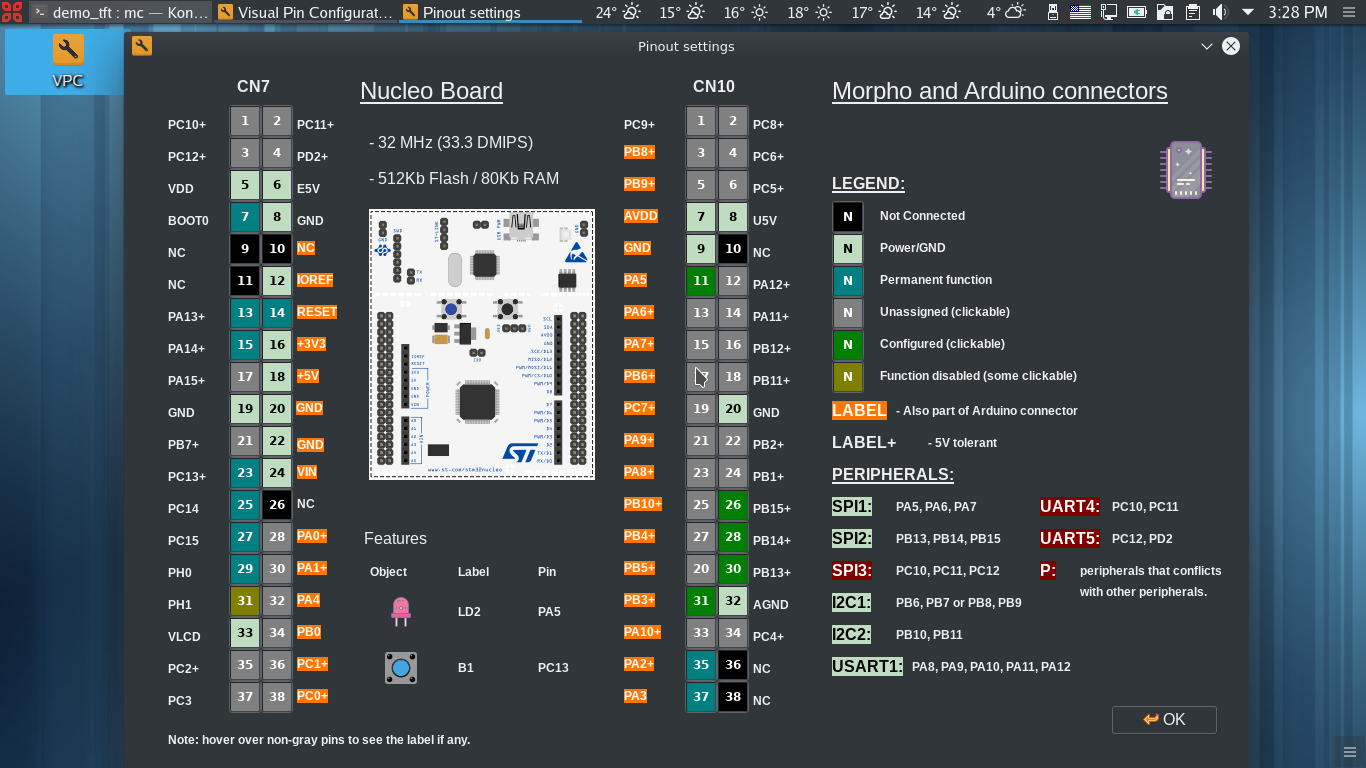
Now set it as in image below but take special care to label it as shown there (ST7735_RST) as this label is used in the library itself. It can be any other free pin as long as it has this label and is set as per image below:

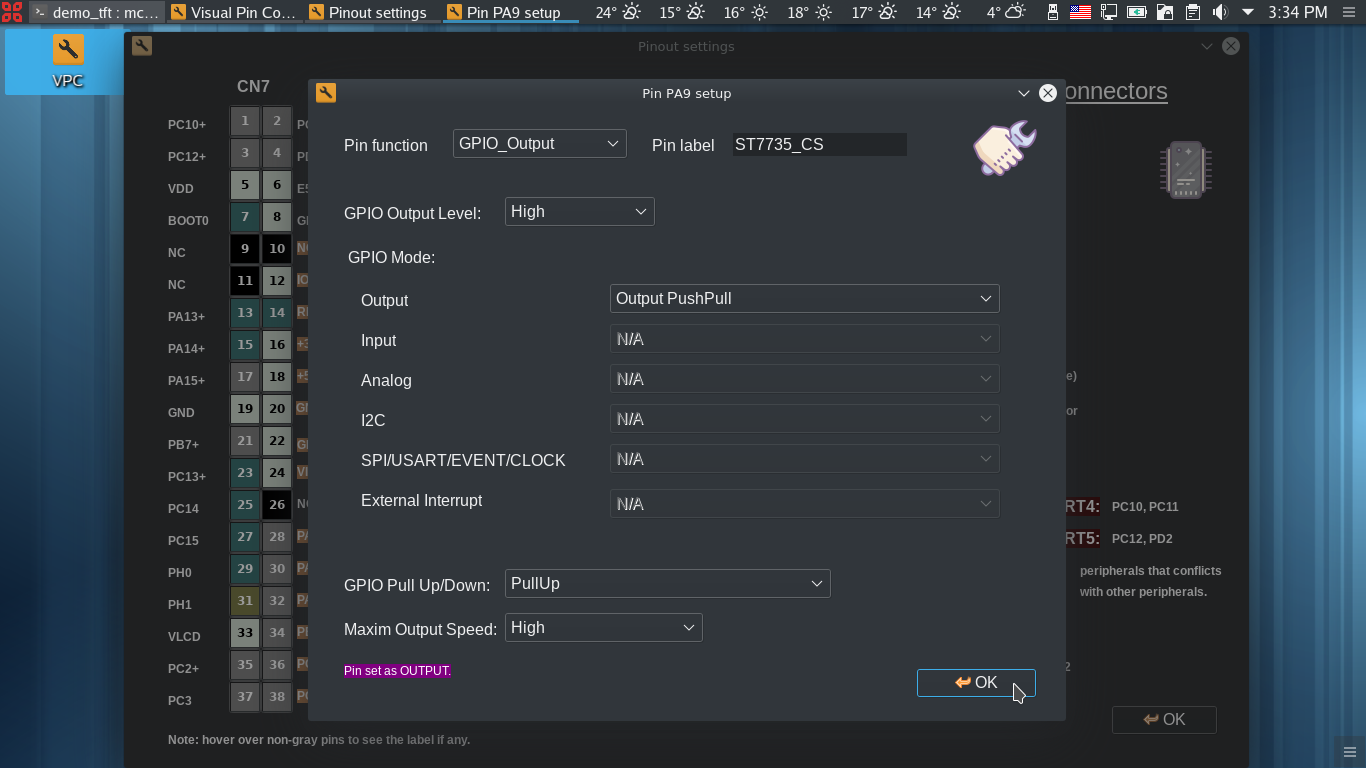
Set the below PC7 and PA9 pins as ST7735_DC and ST7735_CS see the two images below:

Good! You can see all the pins in green colour – check their labels again by hovering the mouse pointer over them. Once this is done, close the Nucleo window:

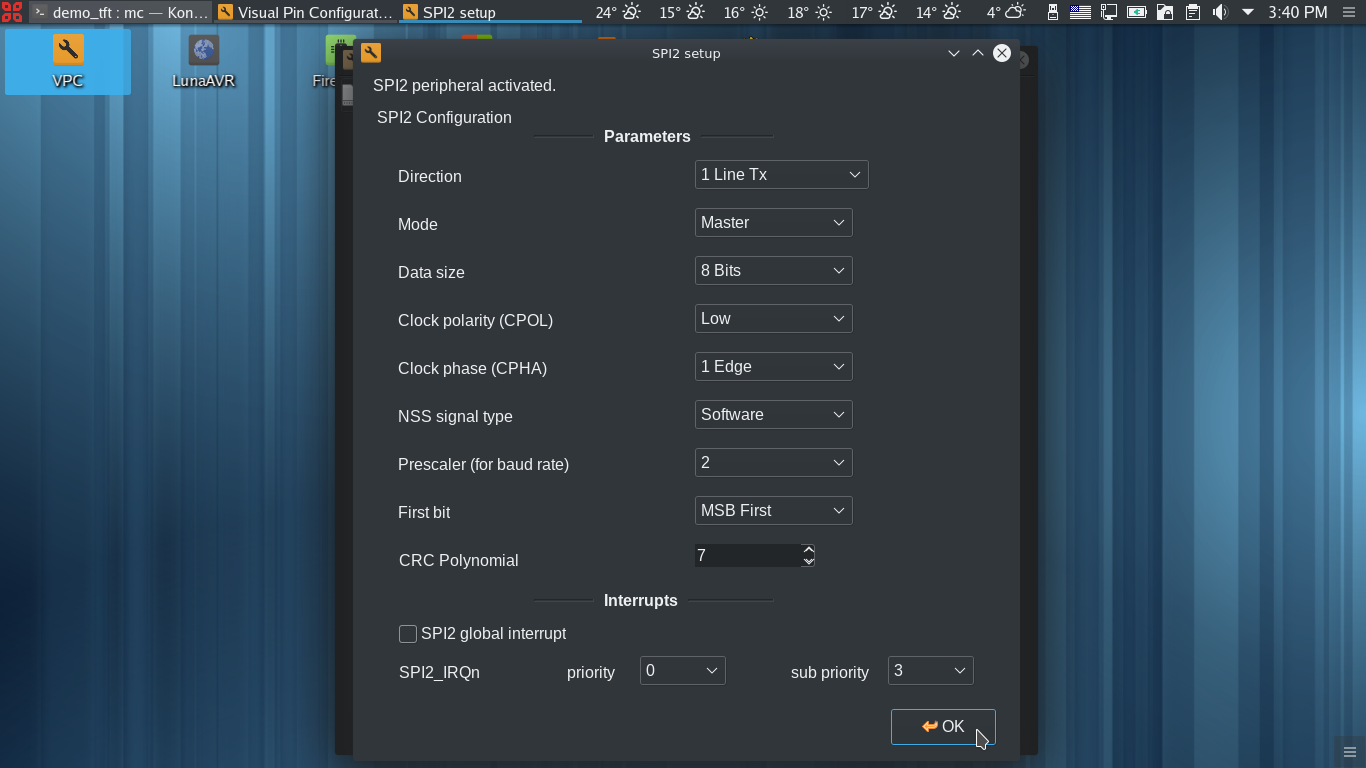
Now we are in the main window. Click on the SPI2 button:

And set the parameters as per image:
Perfect! Now we are ready to generate the code! Click on that gear (Generate Code) button and don’t get scared by the warning.
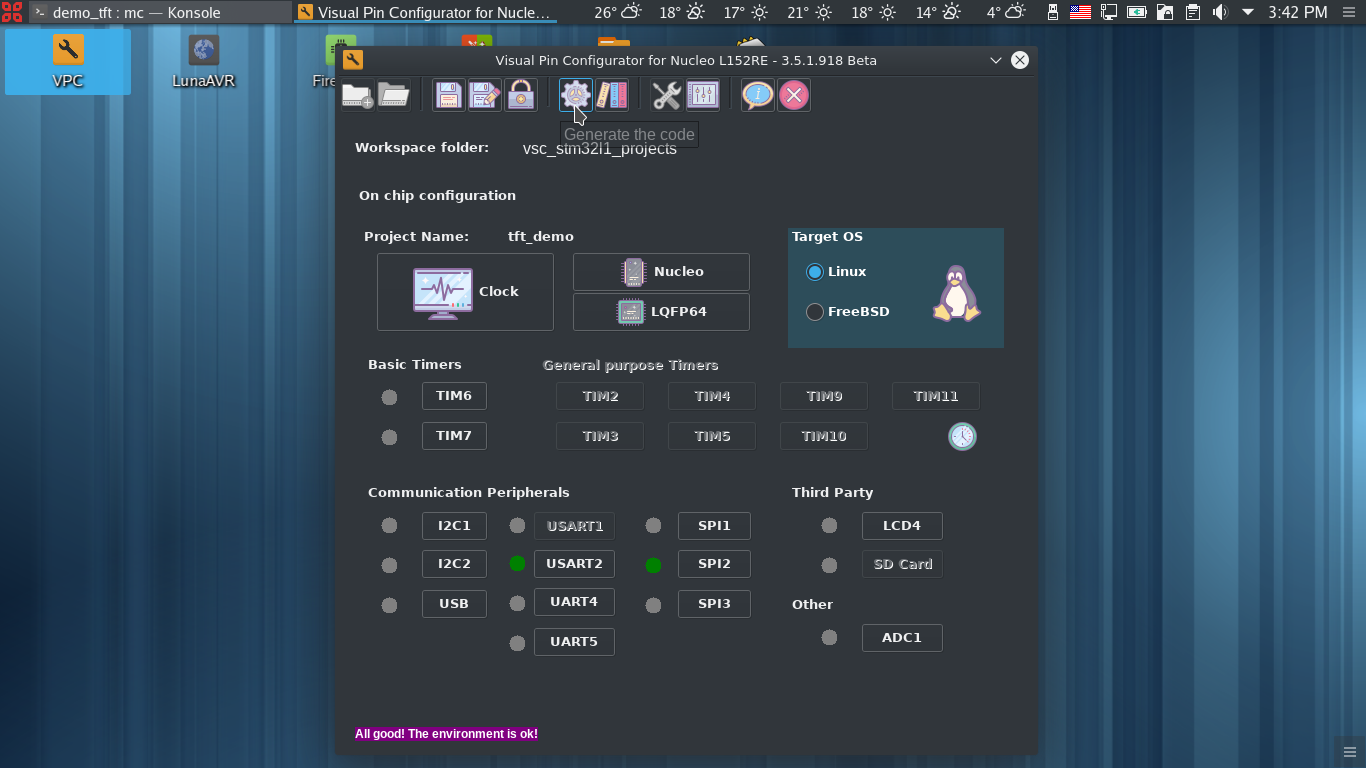
The VPC will generate the initial code, the folder structure, the configuration files for Visual Studio Code IDE and Cortex Debugger, the Makefile and anything else that assures a successful compilation. Close the VPC application.
Opening the project in VSC, adding the user code, compiling and uploading
Ok, launch the Visual Studio Code (this time, I won’t bother you with my extensions) – the thing is, if you don’t need the fancy features of VSC or the cortex-debugger, you can edit the project sources in any editor and use the already provided Makefile to compile and upload the project. But is nice to work with VSC and its auto completion features, at least. Click on Open folder button:
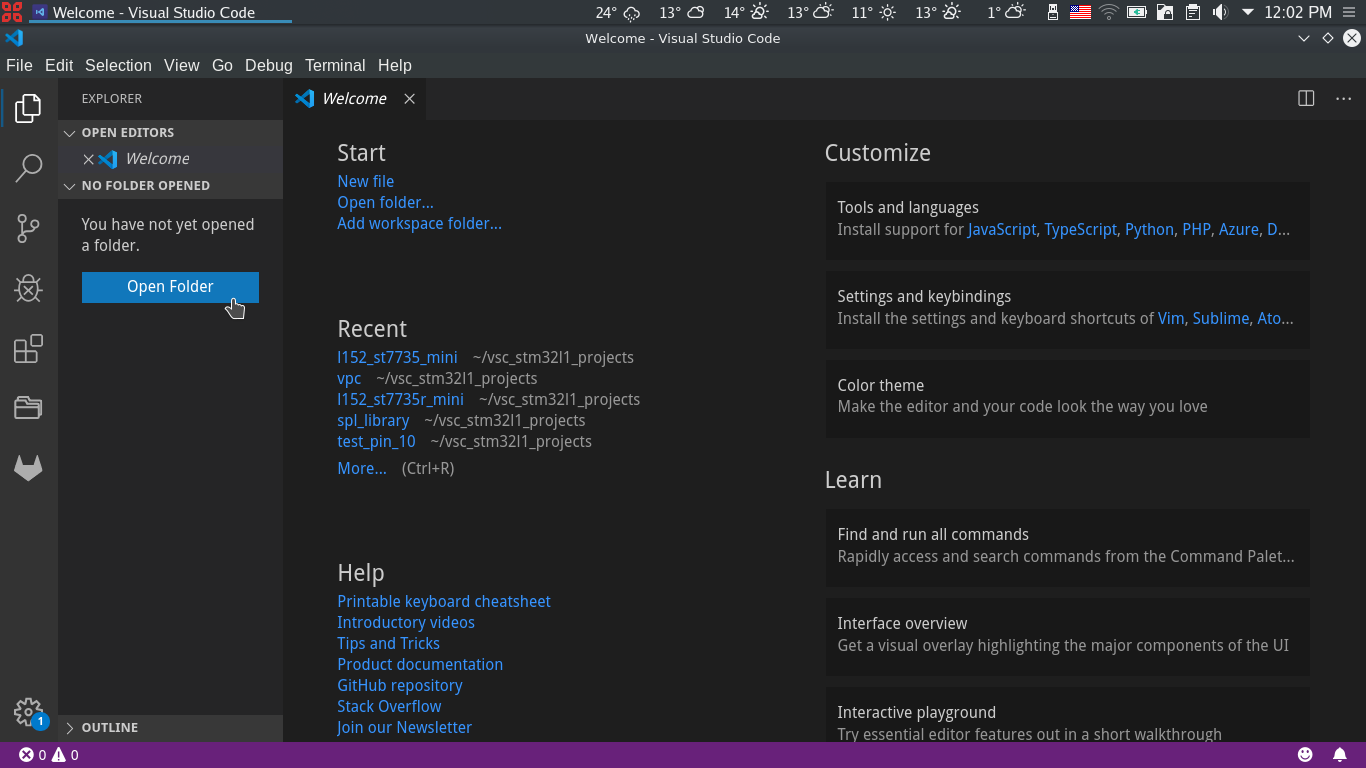
Navigate to the tft_demo folder and open it:

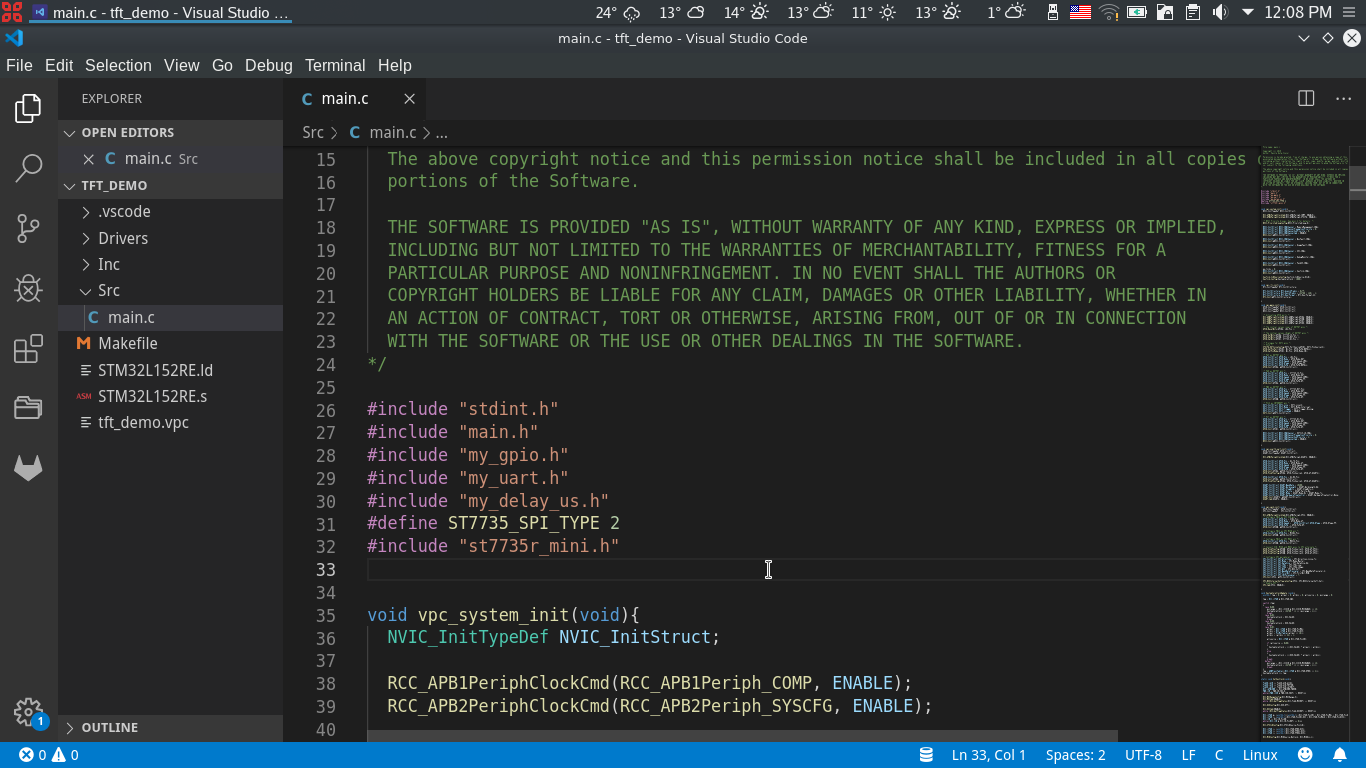
If you are a newcomer, familiarize yourself with what VPC generates – browse the project. Once done, or not in need to do it, open the main.c file to add some code:

Under the last #include directive, add the following code:
#include "my_delay_us.h"
#define ST7735_SPI_TYPE 2
#include "st7735r_mini.h"
as in image below:
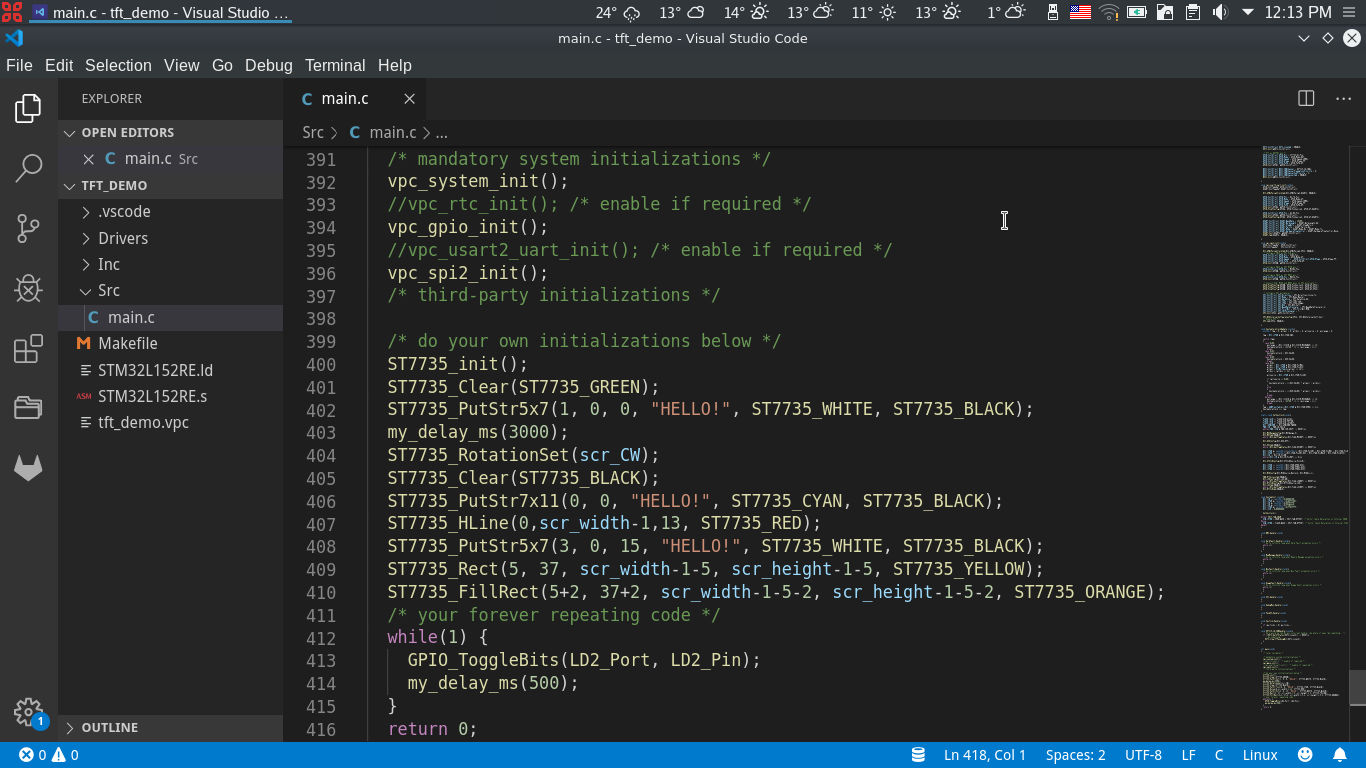
Now, go to the end of the file, where the main function resides:

and replace it entirely with the following code (well I could have added only the required lines, step by step but this way is faster):
int main(void)
{
  /* local variables */

  /* mandatory system initializations */
  vpc_system_init();
  //vpc_rtc_init(); /* enable if required */
  vpc_gpio_init();
  //vpc_usart2_uart_init(); /* enable if required */
  vpc_spi2_init();
  /* third-party initializations */

  /* do your own initializations below */
  ST7735_init();
  ST7735_Clear(ST7735_GREEN);
  ST7735_PutStr5x7(1, 0, 0, "HELLO!", ST7735_WHITE, ST7735_BLACK);
  my_delay_ms(3000);
  ST7735_RotationSet(scr_CW);
  ST7735_Clear(ST7735_BLACK);
  ST7735_PutStr7x11(0, 0, "HELLO!", ST7735_CYAN, ST7735_BLACK);
  ST7735_HLine(0,scr_width-1,13, ST7735_RED);
  ST7735_PutStr5x7(3, 0, 15, "HELLO!", ST7735_WHITE, ST7735_BLACK);
  ST7735_Rect(5, 37, scr_width-1-5, scr_height-1-5, ST7735_YELLOW);
  ST7735_FillRect(5+2, 37+2, scr_width-1-5-2, scr_height-1-5-2, ST7735_ORANGE);
  /* your forever repeating code */
  while(1) {
    GPIO_ToggleBits(LD2_Port, LD2_Pin);
    my_delay_ms(500);
  }
  return 0;
}
as in image below:
Now save the file and go to the Terminal main menu and select the Run Build Task… option:
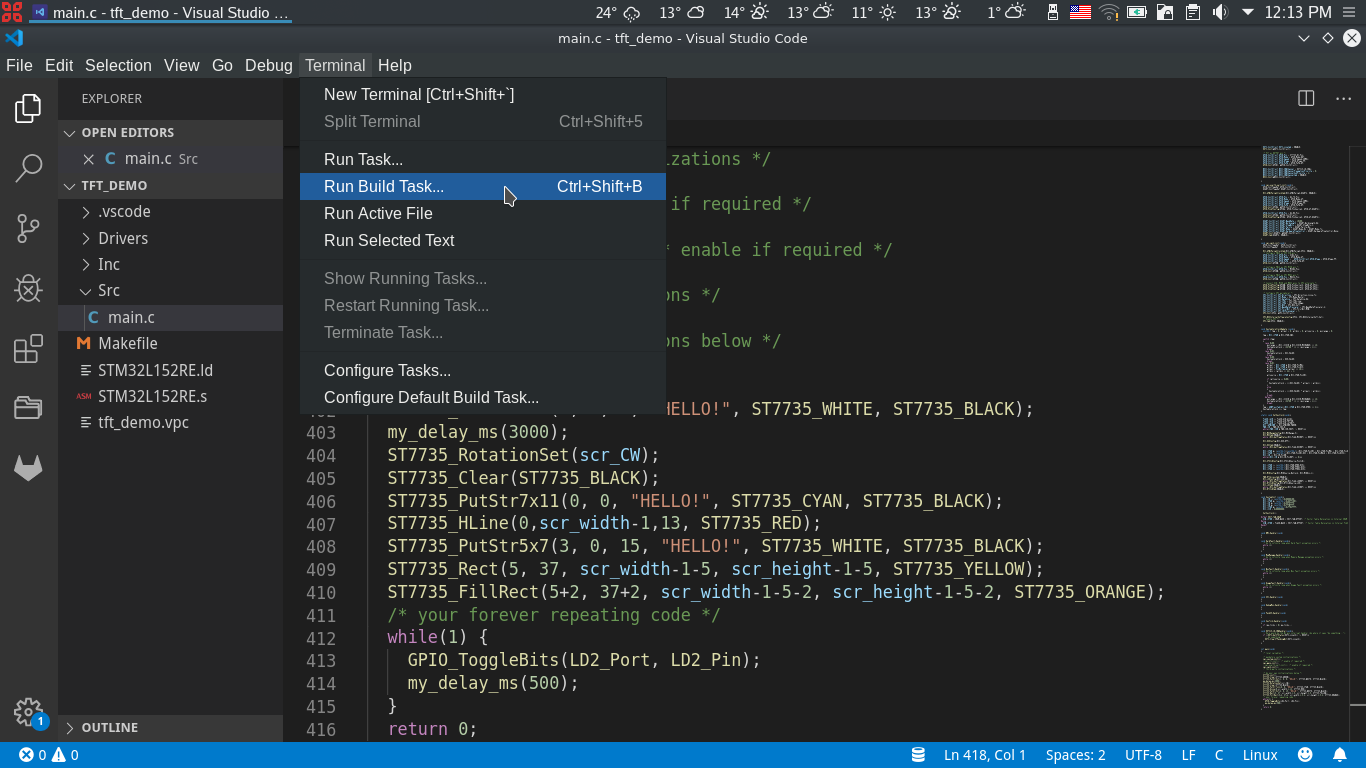
In the window that appears, select the make option:
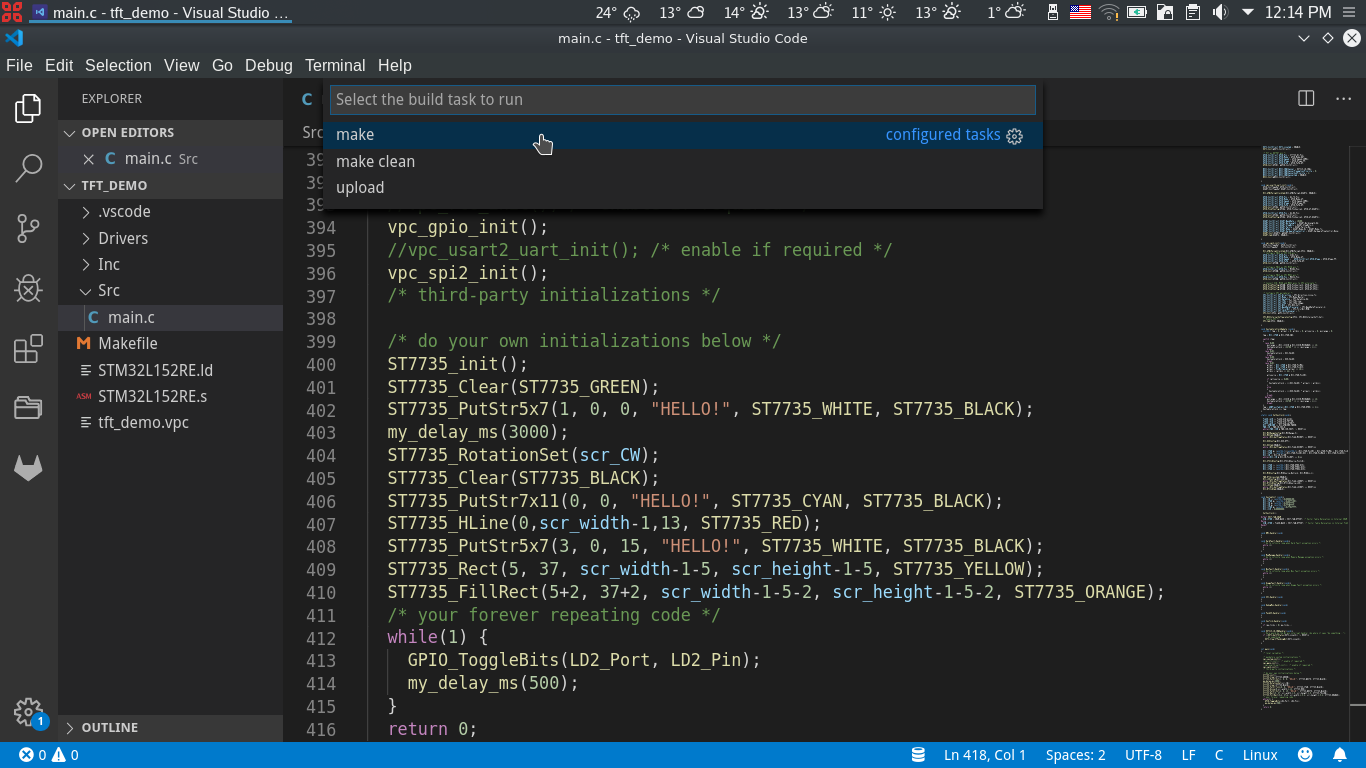
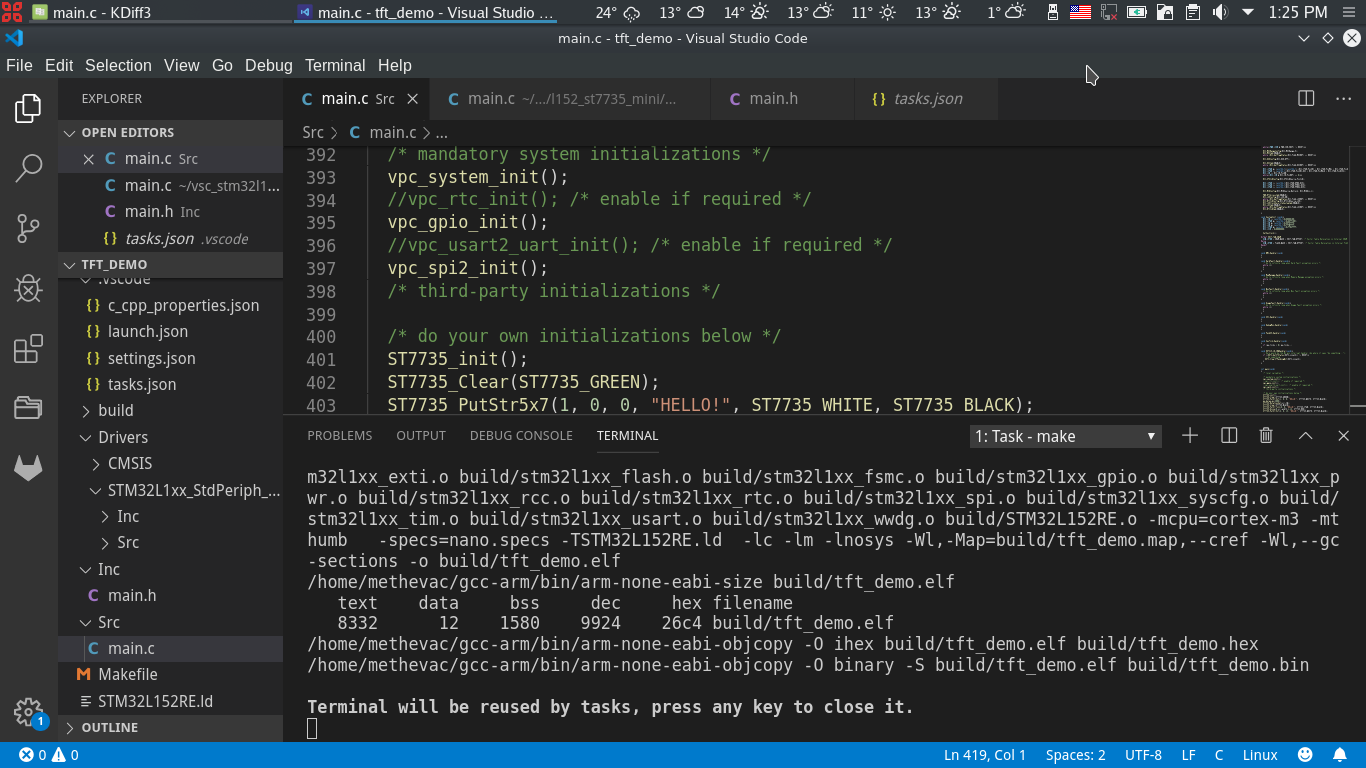
A terminal panel will be opened and the compilation process will start. You should have no errors:
If you did not connected the Nucleo board to your PC, do it now. The TFT display must be also connected, of course.
Go to the Terminal main menu again and select the Run Build Task… option. When the window appears, select upload option:

Now, if there is success – it should be, you’ll get the following messages in the terminal panel:
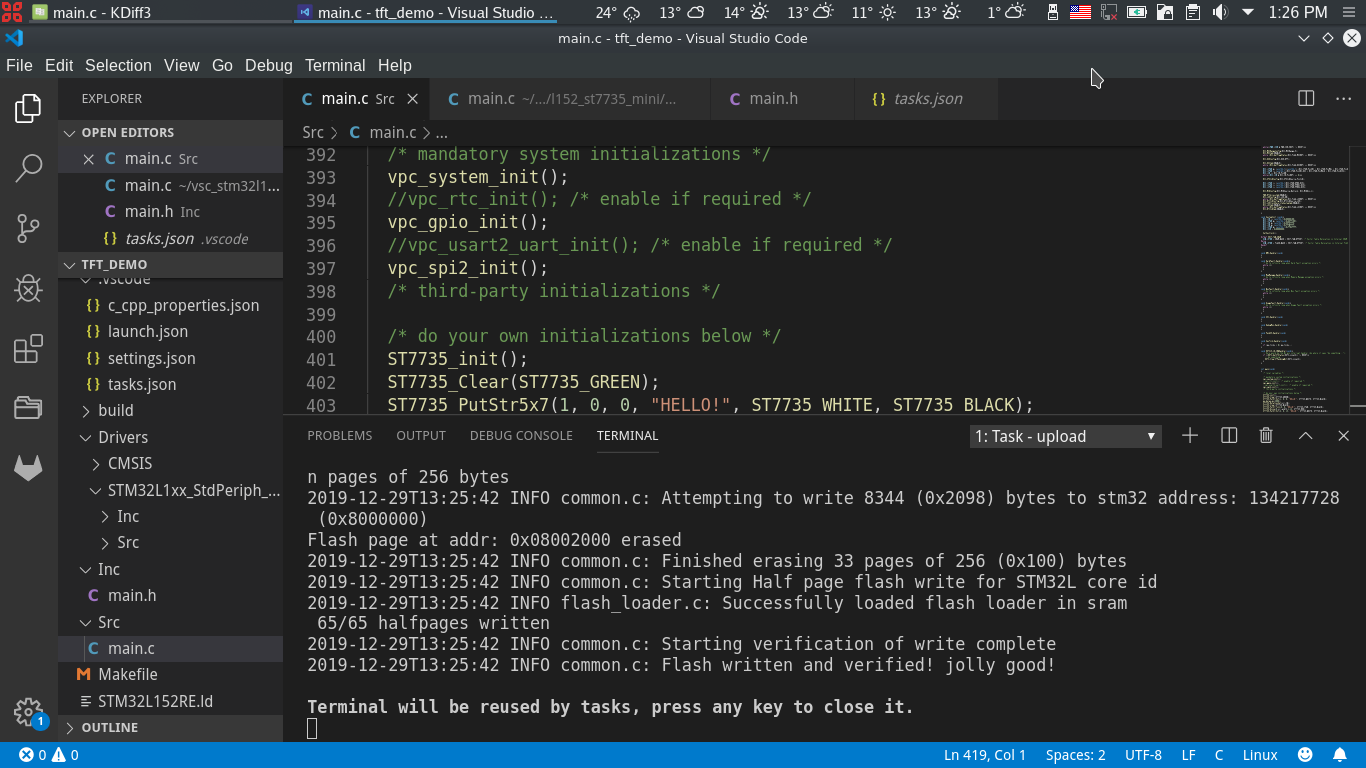
During uploading, the LEDs on the Nucleo board will blink and you’ll get on the TFT display something similar with the content of the first two images in this article. Have fun!
Well, this project is already uploaded in the repository, under the name l152_st7735_mini but is more fun when you do it from scratch, right?
Some feedback?
If you are a long time SPL library user, I would like to know what you think about VPC! How it feels to have for this library an application like CubeMX?
